How To Create A DIY Rainwater Collection System
A DIY rainwater collection system can be an excellent way to make use of natural resources, reduce water bills, and contribute to sustainability. With rising water costs and growing environmental concerns, many homeowners are looking for ways to harness rainwater for various uses, from gardening to washing the car. This article will walk you through the process of building a simple, efficient rainwater collection system that can help you store and use rainwater right at home.
Why Create A Rainwater Collection System?
Rainwater collection is an environmentally friendly way to use the water that naturally falls on your roof. Instead of letting it flow off into the storm drains, you can capture it and use it for things like watering your garden, filling a pond, or even washing outdoor equipment. The ultimate goal is to reduce reliance on municipal water systems, especially in areas where water is scarce or expensive. Not only does this reduce your water consumption, but it also helps manage stormwater runoff. Large amounts of runoff can cause erosion and pollution, especially in urban areas. By capturing rainwater, you can help reduce these environmental impacts.

Essential Components Of A Rainwater Collection System
Before you start building, it’s essential to understand the components of a rainwater collection system. At its most basic, the system includes:
Roof catchment area: The surface area that collects the rainwater.
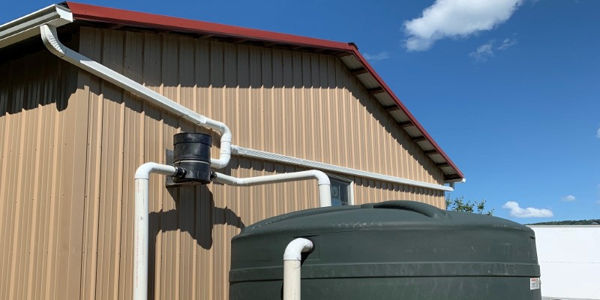
Gutters and downspouts: These channel the water from the roof to the storage container.
First flush diverter: This device ensures that the first few gallons of rainwater, which may contain debris, dust, or contaminants, are diverted away from the storage tank.
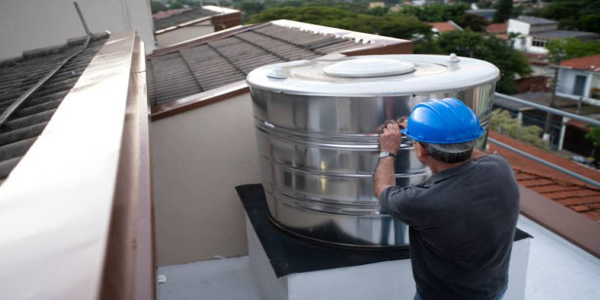
Storage tank: This is where the rainwater is stored. The size will depend on your needs and available space.
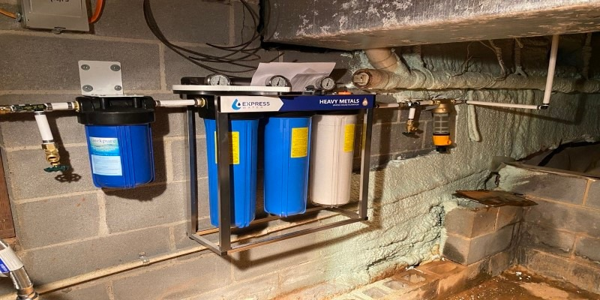
Filtration system: A filter helps to ensure the water stays clean and is suitable for use, especially if you're using it for gardening or other outdoor tasks.
Overflow system: A way to direct excess water when the tank is full, usually through a pipe that drains water away from the foundation of your house.
Step-By-Step Guide To Building Your Rainwater Collection System
Now that you understand the components, let’s dive into the steps to build your system. The process can be as simple or as complex as you want, depending on how much water you plan to collect and the specific needs of your property.
Assess Your Roof And Catchment Area
The first step is to look at your roof to see how much rainwater it can catch. Larger roofs will collect more water, but it’s important to consider the condition of the roof and the type of roofing material. Metal roofs are generally best for collecting rainwater because they don't absorb pollutants like asphalt shingles do. Ensure that your roof is clean and free of debris so that the water flowing into the gutters is as clean as possible.
You also want to consider the amount of rainfall in your area. A general rule of thumb is that one inch of rain falling on 1,000 square feet of roof can yield about 600 gallons of water. This is useful to know when deciding on the size of your storage tank.
Install Gutters And Downspouts
If you don’t already have gutters installed, you’ll need to add them. Gutters are essential because they capture the rain and direct it into the downspouts, which then carry the water to your storage container. When choosing gutters, opt for aluminium or galvanized steel, as these materials are durable and less prone to rust. Plastic gutters are also an option but may not last as long. Make sure that the gutters are positioned properly to direct water into the downspouts. If your roof has multiple sections, you may need multiple downspouts to ensure an efficient flow of water.

Install A First Flush Diverter
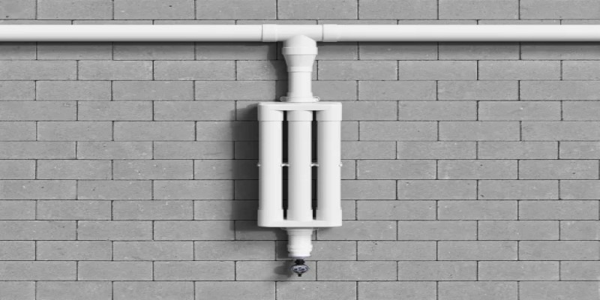
A first flush diverter is a key piece of equipment in any rainwater collection system. When it rains, the first few minutes of water can carry dust, leaves, and other debris from your roof into your storage tank. A first flush diverter ensures that this contaminated water is diverted into a separate pipe, allowing cleaner rainwater to flow into your tank.
There are many types of first-flush diverters available, but they all work on the same principle. Once the system is installed, water will first fill the diverter pipe before it is allowed to flow into the tank. Once the diverter fills, it closes off, and the remaining water flows to your storage container.
Choose And Install A Storage Tank
Choosing the right storage tank is one of the most important steps in building your rainwater collection system. The tank's size will depend on your needs and the available space. You can buy a ready-made rainwater tank, or you can repurpose old barrels, plastic tanks, or other containers. Be sure to choose a durable and suitable material for storing water.

Plastic tanks are a popular choice because they are lightweight, easy to install, and relatively inexpensive. If you want to store large amounts of water, you can install multiple tanks or even an underground system, although this may require more effort and cost. For added efficiency, position your tank at a slightly elevated level so that gravity can help with water flow. This is especially helpful if you plan to use the rainwater for irrigation.
Install A Filtration System
If you're planning to use the rainwater for more than just watering your plants, you’ll want to install a filtration system. Even though the water might look clean, it can still contain small particles, bacteria, or algae. A simple filter at the point where the water enters the tank can help catch larger debris like leaves and twigs.

For drinking water or more sensitive uses, you’ll need a more advanced filtration system, such as activated carbon filters, UV lights, or even a reverse osmosis system. While this may not be necessary for most DIY systems, it’s something to consider if you're collecting rainwater for consumption.
Set Up The Overflow System
An overflow system is critical to ensure that excess water has somewhere to go when your tank is full. This is especially important in areas with heavy rainfall. If the tank fills up and there’s no overflow, the water can cause damage to the system or your property. A simple overflow pipe can direct the water away from the tank and house, usually by draining it into a designated area, such as a garden or drainage ditch.
Maintain Your Rainwater Collection System
Once your rainwater collection system is installed, it’s important to keep it maintained. Clean your gutters regularly to ensure that they’re clear of debris. Check the tank for algae growth, especially if you’re using it for a long period, and clean the first flush diverter and filters periodically. Ensuring that everything is working efficiently will keep your system in good shape for years.

Conclusion
Building a DIY rainwater collection system is a straightforward and sustainable project that can provide you with a valuable resource. While it requires an investment of time and effort, the benefits are well worth it, from saving money on water bills to making a positive impact on the environment. By understanding your needs, gathering the right materials, and following the necessary steps, you can create a system that will help you collect and store rainwater efficiently.
Whether you use your rainwater for gardening, cleaning, or other outdoor tasks, you'll be making a positive contribution to both your household and the environment. As the need for water conservation becomes more critical, this simple DIY project could prove to be a long-term investment in your home's sustainability.


